
![[SOLVED] How to Fix SFTP Permission Errors on Google Cloud](https://www.thearyanews.com/wp-content/uploads/2018/10/fixftp-min.jpg)
![[SOLVED] How to Fix SFTP Permission Errors on Google Cloud](https://thearyanews.com/wp-content/uploads/2018/10/fixftp-min.jpg)
Hey friends if you are facing problems or errors while editing , uploading and deleting your files of Google Cloud Platform by using FTP software (Like: FileZilla) then this is for you. In this tutorial we going to fix that problem so let’s start.
Table of Contents
How to Fix FTP Permission denied – File transfer failed Errors on Google Cloud Platform
Things You Have to Do
- Identify The Error
- Connect to VM Instance
- Check File / Folder Permissions
- Set File / Folder Permissions
- Restart Apache
- Retry to Edit or Upload File
- Done!
1. Identify The Error
What types of Error is showing in FTP?
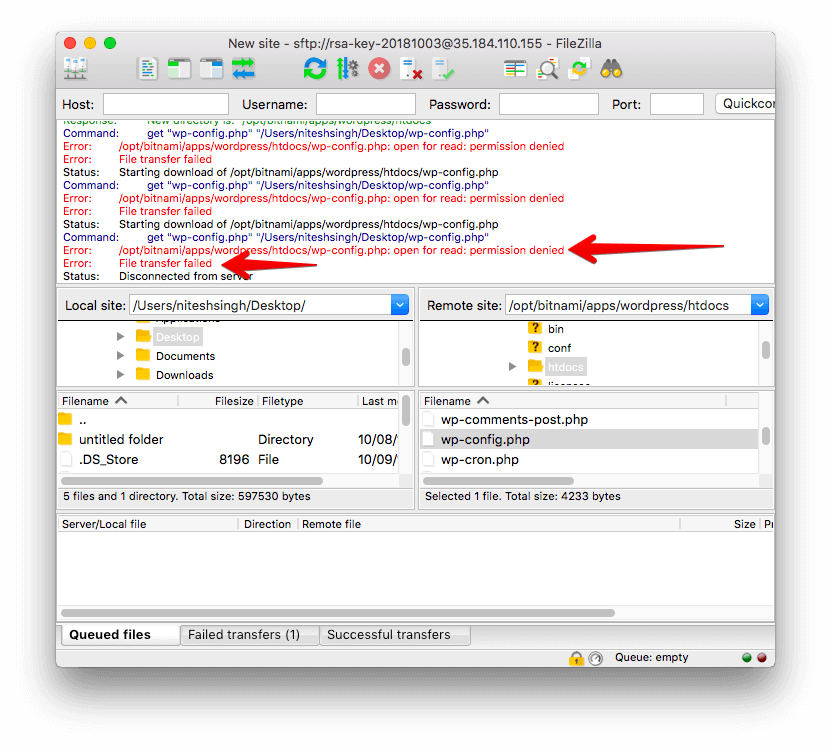
In the image above you can see, the user is attempting to download wp-config.php file in their website’s in htdocs folder via FTP (FileZilla).
Permission denied – File transfer failed This Problem is occurring because the user does not have the required permissions to create new file, change or edit to folder htdocs
2. Connect to VM Instance
In order to fix the problem, you have to edit the file’s permissions in Google Cloud Platform using the SSH (Linux Shell) terminal.
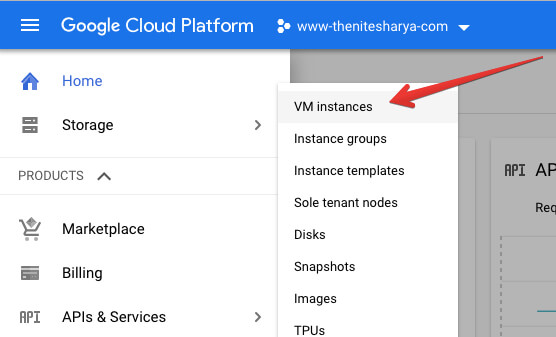
Go to your Compute Engine, then to VM instances to access your VM instance.
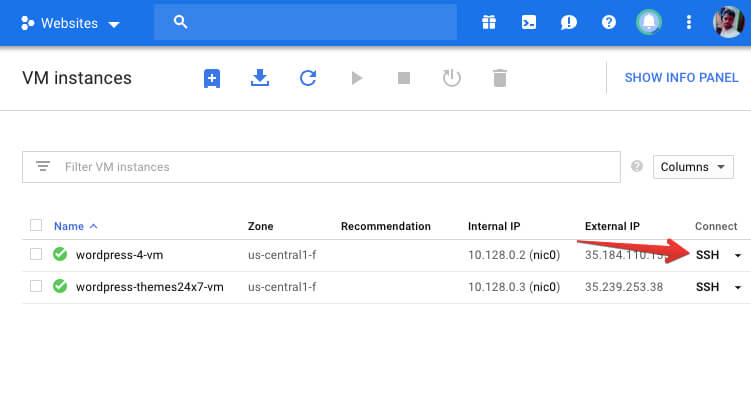
Click on the SSH button to connect to your website via SSH.
3. Check File / Folder Permissions
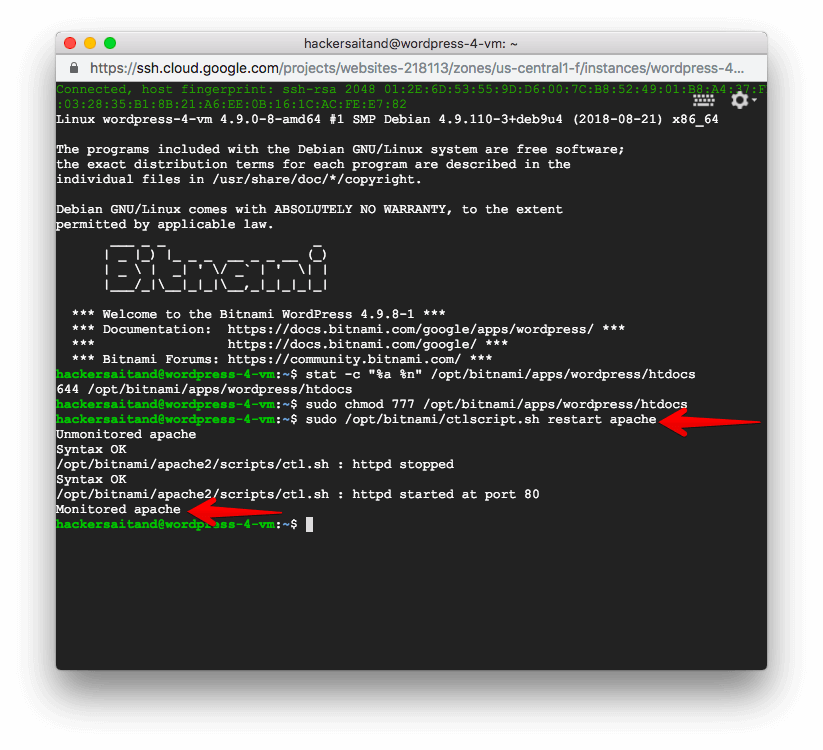
Now if are connected to your website via SSH, the first thing you have to do check the permissions of the file you want to edit. See the example, checking the permissions of the htdocs (here is wp-config.php file and all wordpress file, its also a main folder of website) folder.
To do this, execute the following command:
stat -c "%a %n" /path/to/file

In the above image you can see the command stat -c “%a %n” /opt/bitnami/apps/wordpress/htdocs is used to check the permissions of the htdocs folder.
As you can see the file’s permissions are set to 644
So that was a reason of Permission denied errors and File transfer failed errors, in order to fix the problem we have to set folder permission 644 to 777 so let’s see.
4. Set File / Folder Permissions
In Order to set folder or file permission 644 to 777 you have use this command
sudo chmod 777 /path/to/file

In the above image you can see the command sudo chmod 777 /opt/bitnami/apps/wordpress/htdocs is used to set folder or file permission 644 to 777
5. Restart Apache
Now its time to Restart Apache because without restart, changes will not take any affect
For most Apache configurations, run the following restart command:
sudo service apache2 graceful
For Bitnami Apache configurations, run the following restart command:
sudo /opt/bitnami/ctlscript.sh restart apache
6. Retry File Upload
So now the file/folder has permissions of 777, we will be able to upload/ edit/ download any files from htdocs
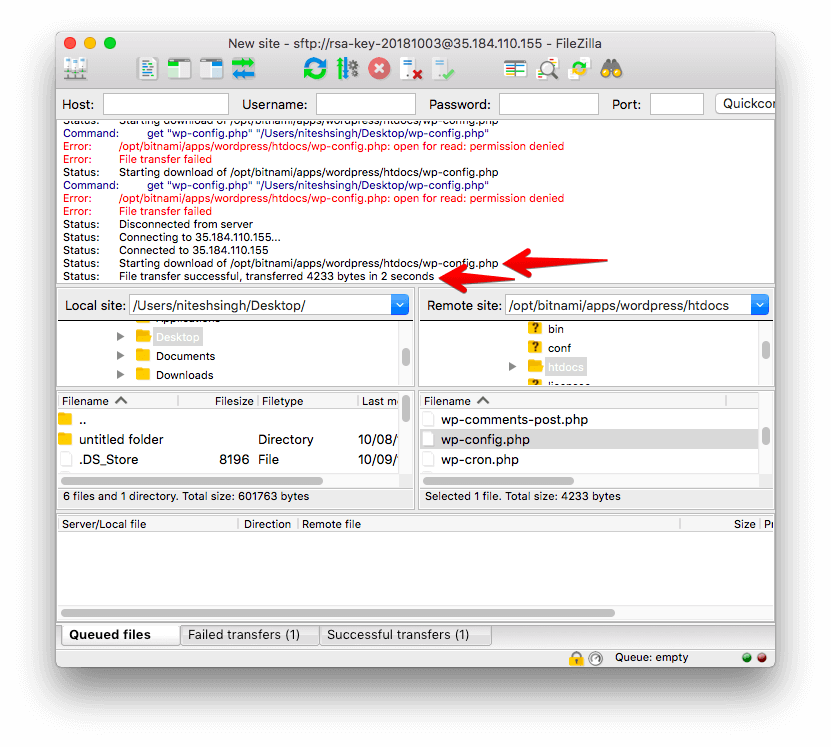
Bingo! We got it, the image above you can see, we have the wp-config.php file downloaded successfully from the server via FTP after changing the file’s permissions from 644 to 777.
Thnks…. Hope you liked, plz give comment.